Bread Machine Dense Loaf? Here Are the Fixes
A dense loaf almost always traces back to one of a handful of fixable problems with ingredients, ratios, or machine settings.
Few things are more frustrating than lifting the lid on your bread machine and finding a squat, heavy brick instead of a proper loaf. The good news is that dense bread has a short list of causes, and most of them are easy to correct once you know what to look for. Yeast health, liquid temperature, flour type, and the order you load the pan all play a bigger role than most people expect. Work through the fixes below and you should be pulling out noticeably lighter loaves within a bake or two.
Products mentioned in this post


Check Your Yeast First
Old or dead yeast is the single most common reason a bread machine loaf comes out dense. Yeast that has been open for more than a few months, or that was stored near heat or moisture, may look fine but produce almost no rise. Before blaming anything else, proof a teaspoon of yeast in a few tablespoons of warm water (around 110 degrees F) with a pinch of sugar and wait ten minutes. If it does not get foamy and active, replace the jar. Bread machine yeast and instant yeast are interchangeable and tend to outperform active dry yeast in these appliances because they dissolve faster during the mixing cycle. Store any open yeast in the freezer and it will stay reliable for up to a year.
Get the Liquid Temperature Right
Water or milk that is too hot will kill yeast before it gets a chance to work, and liquid that is too cold will slow fermentation so much that the dough barely rises before baking begins. The target range for most bread machine recipes is 80 to 110 degrees F, with 95 to 100 degrees being a reliable middle ground for instant yeast. Room temperature liquids are usually fine in summer, but tap water straight from the cold tap in winter can be too chilly. An inexpensive instant-read thermometer takes the guesswork out completely. If your kitchen runs cold, warm the liquid for about 20 seconds in the microwave and check the temperature before pouring.
Measure Flour the Right Way
Too much flour is a very common culprit in dense bread machine loaves. Scooping a measuring cup directly into a flour bag compacts the flour and can add 20 percent or more over the intended amount, which throws off the dough hydration. The correct approach is to spoon flour into the measuring cup and level it off with a straight edge, or to weigh flour with a kitchen scale if your recipe lists grams or ounces. Bread flour produces noticeably lighter loaves than all-purpose flour in a bread machine because its higher protein content builds stronger gluten strands that trap gas from the yeast. If you have been using all-purpose and getting dense results, switching to bread flour is one of the fastest single-ingredient fixes you can make.
Load Ingredients in the Correct Order
Most bread machines require you to add liquids first, then dry ingredients, with yeast going in last and kept away from the liquid until the cycle starts. This order matters because many machines have a delayed-start timer, and if the yeast contacts the liquid too early it can begin to activate and exhaust itself before baking. Check your machine's manual for its specific loading sequence, since some models reverse the liquid and dry order. Keeping salt and yeast separated in the pan is also important, as direct contact between salt and yeast will slow or kill the yeast. A small depression in the flour is the standard place to put yeast so it stays dry until mixing begins.
Use the Right Cycle for Your Recipe
Whole wheat, multigrain, and rye breads need longer kneading and rising times than white bread, and using the basic white cycle for these heavier doughs will produce a dense loaf almost every time. Most bread machines include a whole wheat or whole grain cycle that adds extra time to each phase, and that extra time is not optional for these recipes. Conversely, using the whole wheat cycle on a light white bread recipe can over-proof the dough, causing it to collapse before baking and resulting in a dense, gummy center. Match the cycle to the recipe type rather than defaulting to whatever you used last. If your machine offers a rapid or express bake cycle, know that it shortens the rise time and tends to produce denser loaves regardless of recipe quality.
Adjust the Dough Hydration If Needed
After the first kneading cycle begins, open the lid and check the dough ball. It should be smooth, slightly tacky to the touch, and pulling cleanly away from the sides of the pan. A dough ball that looks dry and crumbly needs one to two tablespoons of additional water added gradually. A dough that spreads flat and sticks to the pan walls needs an extra tablespoon or two of flour. Getting this balance right is the most impactful fine-tuning you can do. Humidity and altitude both affect how much liquid flour absorbs, so the same recipe may need small tweaks in different climates. Once you find the right ratio for your kitchen, note it in the recipe so you do not have to adjust every time.
Consider the Machine Wattage and Pan Size
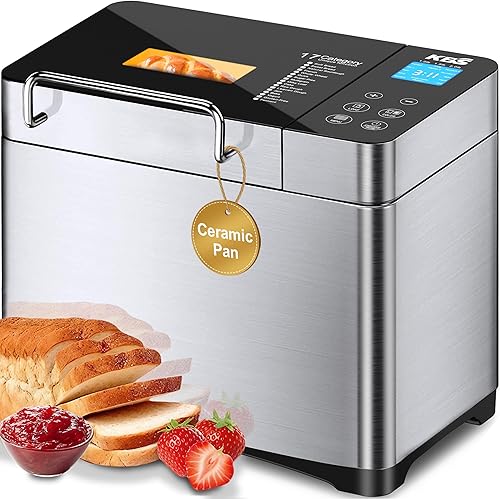
Lower-wattage bread machines may struggle with larger loaves or dense doughs because they cannot maintain consistent baking temperature throughout the cycle. The Cuisinart CBK-110P1ES runs at 550 watts with 12 programs and has over 16,000 ratings at 4.4 stars for around $120, putting it in a typical mid-range wattage band. The KBS MBF-010 runs at 710 watts with 17 programs and more than 11,000 ratings at 4.4 stars for around $130, giving it more consistent heat for whole grain and enriched doughs. If your machine is older and runs below 500 watts, it may simply lack the power to properly bake a standard 1.5 or 2 pound loaf without producing a gummy center. Sticking to a smaller loaf size than the machine's rated maximum is a simple way to improve bake quality on lower-wattage units.
Frequently asked questions
Why does my bread machine bread always come out gummy in the middle?
A gummy or undercooked center usually means the loaf did not reach the right internal temperature before the cycle ended. This can happen if the dough was too wet, if the loaf size was too large for the machine's wattage, or if the lid was opened during baking. Try reducing the loaf size by one setting, tighten the liquid ratio, and avoid lifting the lid after the bake phase begins.
Can too much yeast cause a dense loaf?
Yes. Using more yeast than the recipe calls for can cause the dough to rise very fast and then collapse before or during baking, which produces a dense, wrinkled loaf with a coarse interior crumb. Stick to the measured amount in the recipe. If you are baking at high altitude, you may actually need to reduce yeast by about 25 percent because dough rises faster with lower air pressure.
Does the brand of bread flour matter?
Not significantly. What matters is the protein content, which should be around 12 to 13 percent for bread flour. Most national brands fall within that range. Avoid self-rising flour or cake flour, both of which have the wrong protein levels for a yeast loaf. If a recipe does not specify bread flour, try it with bread flour anyway before concluding there is a different problem.
My loaf rises well but still comes out dense. What is going on?
A loaf that rises properly but bakes up dense often has a hydration problem or gluten that did not develop fully during kneading. Check that the kneading paddle is seated correctly in the pan, since a loose or missing paddle will not work the dough properly. Also confirm you are using bread flour rather than all-purpose, and that the dough was not too stiff during the knead cycle.
How do I store bread machine bread so it does not stale quickly?
Bread machine bread has no preservatives, so it stales faster than store-bought. Let the loaf cool completely on a wire rack before slicing or storing, since cutting into a hot loaf traps steam and creates a gummy texture. Wrap it in a cloth or paper bag at room temperature for up to two days. For longer storage, slice the loaf and freeze it in a zip bag. Refrigerating bread actually speeds up staling and is worth avoiding.