Using the Dough-Only Setting on a Bread Machine
The dough cycle handles mixing, kneading, and the first rise so you can shape and bake your bread exactly the way you want it.
Most bread machines include a dough-only cycle, and it does exactly what the name says: it mixes, kneads, and proofs your dough without baking it. At the end of the cycle you pull out a smooth, risen ball of dough ready to shape and bake in your regular oven. This is the setting to use when you want a homemade crust, dinner rolls, pizza dough, or cinnamon rolls without surrendering control of the final shape and crust color. Once you understand what happens inside the machine during this cycle, it becomes one of the most useful tools in your kitchen.
Products mentioned in this post


What the Dough Cycle Actually Does
When you start the dough cycle, the machine runs through three distinct phases. First it mixes the ingredients until no dry flour remains, then it kneads the dough for roughly 20 to 30 minutes depending on the model. After kneading, the machine holds the dough at a warm temperature, usually around 75 to 80 degrees Fahrenheit, to allow the first rise. Most dough cycles finish in about 90 minutes total, though some machines run longer for enriched doughs. The machine beeps or signals when the cycle ends, and you take the dough from there. Nothing is baked, so there is no crust formed inside the pan.
Which Doughs Work Best in the Dough Cycle
Basic white bread dough and whole wheat dough are the most forgiving and give very consistent results. Pizza dough also works extremely well because the machine handles the kneading precisely, and under-kneaded pizza dough is one of the most common reasons homemade pizza tears when stretched. Dinner roll dough, sandwich bread, and soft pretzel dough all come out well. Enriched doughs with eggs and butter, like brioche, need a machine with enough wattage to push through the heavier mixture without straining the motor. Very stiff doughs, like bagel dough, can work but put more stress on lower-wattage machines, so keep an eye and ear on the machine during the knead phase.
How to Use the Dough Cycle Step by Step
Add your liquid ingredients to the pan first, then flour on top, with salt kept away from the yeast until they are blended together during mixing. Add yeast last, either in a small well on top of the flour or according to your machine's instructions. Select the dough cycle, press start, and let the machine do its work. When the cycle ends, turn the dough out onto a lightly floured surface and shape it into rolls, a loaf, or whatever form you need. Cover the shaped dough and let it rise a second time before baking. The second rise typically takes 30 to 60 minutes depending on room temperature and the amount of yeast in the recipe.
Checking Dough Consistency During the Knead Phase
The dough cycle gives you a window to check consistency before the rise starts. About 5 to 10 minutes into kneading, lift the lid and look at the dough ball. It should be smooth, slightly tacky but not sticking to the sides of the pan, and pulling cleanly away from the edges. If it looks sticky and is smearing on the pan walls, add flour one tablespoon at a time. If it looks dry and crumbly, add water one tablespoon at a time. This quick check takes 30 seconds and prevents a failed dough that you would only discover at the end of the 90-minute cycle. Most machines tolerate the lid being opened briefly during the knead phase without any issues.
Machines That Handle the Dough Cycle Reliably
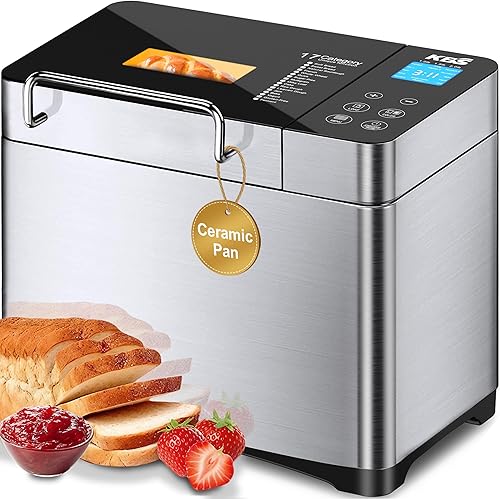
A machine with 550 watts or more handles most standard bread and pizza doughs without issue. The Cuisinart CBK-110P1ES, rated 4.4 stars across more than 16,700 reviews, runs at 550 W and includes 12 programs including a dedicated dough setting, making it a solid everyday choice. The KBS MBF-010, also rated 4.4 stars from over 11,400 reviewers, runs at 710 W with 17 programs and handles heavier doughs better due to its higher wattage. For those who want even more program flexibility, the KBS MBF-014A carries 20 functions at 650 W and has earned 4.4 stars from more than 5,300 buyers. Higher wattage gives the motor more headroom when pushing through stiff or enriched doughs.
Common Mistakes When Using the Dough Cycle
The most common mistake is letting the dough sit in the machine after the cycle ends. Bread machines stay warm after finishing, and if you leave the dough inside for too long it will over-proof and become slack and sticky. Pull it out as soon as the machine signals the end of the cycle. Another frequent error is skipping the second rise after shaping. The dough cycle handles only the first rise, and skipping the second produces dense bread with poor texture. Finally, make sure your yeast is fresh. Old or dead yeast gives you flat, heavy dough no matter how well the machine kneads it, and no amount of extra time in the machine will fix that.
Using the Dough Cycle for Pizza and Flatbreads
Pizza dough is one of the best uses for the dough cycle because it benefits greatly from consistent, extended kneading. Load your flour, water, olive oil, salt, and yeast, run the dough cycle, and you have a well-developed dough ready to rest in the fridge overnight or use immediately after a short second rest on the counter. Cold-retarded dough stretched from the fridge needs about 20 to 30 minutes at room temperature before it will stretch without springing back. Flatbread doughs like naan and pita also come out of the dough cycle in good shape. Because these are baked at high heat and do not need a tall rise, you can often skip or shorten the second proof and still get good results.
Frequently asked questions
Can I use the dough cycle for gluten-free dough?
Yes, but gluten-free dough behaves differently from wheat dough and is more of a thick batter than a cohesive ball. Many machines include a specific gluten-free setting that adjusts the knead and rise times for these recipes. If yours only has a standard dough cycle, check that the mixture is evenly combined but do not expect it to form the smooth ball you see with wheat dough. Always follow a recipe designed for bread machines when working with gluten-free flours.
How long does the dough cycle take?
Most dough cycles run between 90 minutes and 2 hours. The exact time depends on the machine model and the program selected. Some machines have a quick dough setting that finishes faster but produces dough with less development, which can affect texture. Check your machine's manual for the specific duration, and plan for an additional 30 to 60 minutes of second rise after you shape the dough.
Can I refrigerate the dough after the cycle ends?
Yes, and refrigerating the dough is a good option if you are not baking right away. After the cycle ends, turn the dough out, shape it loosely, cover it tightly with plastic wrap, and place it in the fridge for up to 24 hours. Cold dough rises slowly in the refrigerator, so you skip the second rise at room temperature. Bring the shaped dough out about 20 to 30 minutes before baking to take the chill off, then bake as usual.
My dough came out sticky after the cycle. What went wrong?
Sticky dough after the cycle usually means too much liquid relative to flour, or the dough over-proofed because the machine ran too warm. Check your recipe measurements and make sure you are using the right flour type, since bread flour absorbs more water than all-purpose flour and produces a firmer dough. If the machine itself runs hot, try reducing the liquid slightly next time. A brief knead by hand on a floured surface can bring an only slightly sticky dough back into shape.
Does the dough cycle work for sourdough?
The dough cycle can mix and knead a sourdough dough, but it is not well suited for the long, slow fermentation that sourdough requires. Sourdough starter works best with extended rest periods at cool temperatures, and most bread machine dough cycles run at temperatures and for durations that are too short for proper sourdough development. You can use the machine for the initial mixing and kneading only, then transfer the dough to a bowl and handle the rest of the fermentation at room temperature or in the fridge on your own schedule.